|
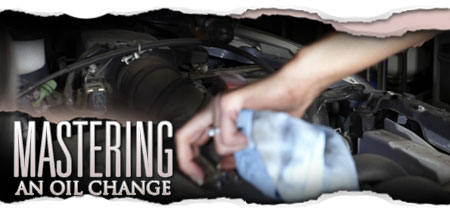
12 Easy Steps For a Do It Yourself Oil Change
by
Dr. Fran Lockwood
We live in a convenience-based society, but a quick burger from the local drive-through
is never as satisfying as that meal you make in your own kitchen. With a simple
recipe, even a novice cook can whip up a dish that tastes better and probably
costs less. The same holds true when it comes to basic automobile maintenance,
such as changing the oil. With the right tools and a foolproof set of instructions,
your garage can be a quick stop for oil changes and a place where you can save
money while you have the satisfaction of getting your hands dirty.
Choosing
the Right Ingredients
The
key to any successful recipe is gathering the right ingredients, and the same
holds true for the recipe for successful oil changes. Step one is choosing the
correct motor oil. Motor oils are typically defined by grade, and a good rule
of thumb is the higher the grade, the thicker the oil.
Today's
oils are generally multi-grade, which means that they are suitable for use in
a range of temperatures. Motor oils can range from full synthetics to synthetic
blends to conventional (mineral oil-based) oils to motor oils geared specifically
by car type. It's important to keep in mind the different needs for different
cars.
Full
synthetic motor oil is formulated to provide maximum protection in severe conditions
and meet the performance requirements of almost all vehicles. Premium full synthetic
motor oil is recommended for diesel powered cars and gasoline powered naturally
aspirated and turbocharged vehicles, including luxury and high performance automobiles,
light trucks and SUVs.
Synthetic
blend oils are formulated with a combination of premium quality base oils and
high-tech synthetics to reduce deposits, and increase wear protection and cold-weather
starting capabilities. Oil blends are recommended for luxury and high performance
cars, light trucks, and sport utility vehicles (SUVs).
Conventional
motor oils are formulated to provide resistance to sludge deposits, hold engine
oil contaminants in suspension, and help keep an engine clean and operating efficiently.
Specialty
oils are formulated to meet the needs of specific classes of vehicles. To make
sure you choose the right oil for your vehicle, consult your owner's manual for
the specific grade and type, ask your local mechanic, or go to an oil change center
and ask a service technician for some help. The type is specified by the American
Petroleum Institute (API) category, on the label, e.g., the most up-to-date category
is API SJ. This category is okay to use if your owner's manual specifies one of
the prior categories, SH, SG, etc. If you have a diesel pick-up truck, your owner's
manual will probably call for an API CH-4 oil or one of the earlier "C"
categories. Be sure you buy a diesel motor oil with at least the minimum required
"C" category. When you are sure you know the right type, buy at least
six quarts for your DIY oil change.
The
Right Tools for the Job
Just
as the right kitchen tools are essential to any chef, you'll need a few basic
items before changing your oil. Your shopping list should include your motor oil,
an oil filter, an air filter (if it's time to change — usually 12,000 miles),
an oil drain pan, an oil filter wrench (check your oil filter type before purchasing
this), and a socket wrench for removing the drain plug. Two final tips before
popping the hood: wear old clothing as oil may spill, and park the car on level
ground to avoid leakage when the oil filter is open.
Now
you're ready to start your oil change!
Jack it up — If necessary, use drive-on jack ramps to elevate the car enough to leave room for you and a wrench. (Drive-on ramps are safer than jacks are).
Pop the hood — Locate items that will be essential during the oil change such as the oil filter housing, the dipstick/tube, the oil fill cap, and the drain plug. Remove the oil fill cap and dipstick, then use the oil filter wrench to loosen the oil filter-housing four to five complete turns to allow the air to get in so the oil can drain out). Loosening the oil filter may result in spillage; temporarily put the oil pan under the filter. Place your oil drain pan directly under the drain plug on the engine.
Drain it out — Using a socket wrench or a combination wrench of the right size, loosen the oil drain plug on the engine and remove it completely. Let the oil drain completely from the engine.
Look at your used oil — This is a benefit of being a do-it-yourselfer. A thick, burned smelling oil means your oil got too hot most likely due to either not draining at proper intervals, or a malfunction of the cooling (radiator) system. A milky oil has water or antifreeze in it, signaling the need for more frequent oil changes or repair to the cooling system. Dirt particles present - are you changing the air filter often enough? If you are really the curious type, more detailed "oil analysis" is available by mail; check the Internet for sources.
Tighten it up — Replace the drain plug on the engine oil pan. Tighten the drain plug.
Remove the filters — Next place the drain pan directly under the oil filter.At this point, the filter should be removable by hand. If not, use your filter wrench and rotate the filter counter-clockwise to remove it.
Rub the gasket — Before attaching the new filter, rub motor oil on the rubber gasket on the base. If you don't do this, it will be hard to get the filter off the engine the next time. Make sure the gasket from the old filter came off and isn't stuck on the housing.
Screw it on — Screw the new filter onto the filter pipe all the way down the base (using hands only). Turn it until it is tight. Use the filter wrench and turn the filter one-quarter turn more to seal it.
Fill it up — Find the engine oil fill on the valve cover and the amount of new engine oil specified in your owner's manual, usually four to five quarts. Cap the oil fill hole. Pull the engine dipstick and check the oil level. You will find that it reads high. The reason is because the filter is empty; this extra quart resides in the filter when the engine is shut down.
Lower the car — Okay, you are finished; now lower the car.
Crank it up — Start the engine but do not rev it, just let it idle. The light on the dash that says "OIL" will illuminate briefly and then extinguish while your oil pump picks up the new oil and pressurizes the system. Let the car run for about five minutes to warm up the engine and allow the oil to circulate. Check under the vehicle and make sure the filter is not leaking oil onto the pavement. Shut the engine off. Check the dipstick on the engine to make certain it reads "FULL." Save your used motor oil for proper disposal.
Congratulations! You have just successfully completed your oil change. It's an easy recipe and one that you'll probably not need to refer to after you've done it a couple of times. But the feeling of accomplishment you'll have (and the dollars you've saved) is as satisfying as a home-cooked meal.
Get more great tips at Valvoline Motor Oil. |